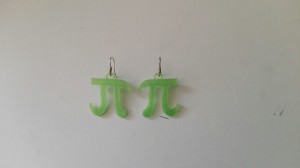
3d print small pieces.

I often read in the forums about the problems that arise when you have to print small pieces.
To understand why printing small pieces is something that doesn’t always work well, we need to think about how an FDM 3d printer works.
The extruded material is deposited layer by layer on itself after being melted and assuming it is PLA means at no less than 190 °.
The cooling time of the PLA, once pushed out of the nozzle, is not very fast and is influenced by some factors, for example the presence or absence of fans or the time that passes before a subsequent layer is deposited on top of the previous one. The delayed cooling, due to a very short time between one layer and another, causes the piece in that area to be deformed by the residual heat aided by the next step and often affects the whole print. Let’s see how to try to solve this problem.
Let’s work with the slicer
In some slicers there is a function that allows you to set the minimum time that the printer must take to create a layer, for example in CURA “Minimal layer time” but it is also present in other software. Increasing this value actually means slowing down the printing process and it is advisable to do so, in my opinion, only in some cases. In particular if our piece is “irregular”, for example with a wide and high base but three or four tall and thin columns starting from the base, this parameter will only slow down the printing only during the construction of the columns, the base it will be printed with the “standard” speeds we set in our slicer configurations.
Often this is how we solve but in the case of a single small piece, increasing the minimum printing time of a layer can mean increasing “all” the printing time and for a single piece it is not a guarantee of quality. An alternative is to print more than one piece of the same object or several objects with very similar dimensions, possibly placed at a distance from each other. In this way the passage of the hotend on the last printed layer for example of the first object takes place after having made the layers equal to the others and therefore giving more time to the first object to cool down.
Again depending on the shape of the object to be printed, imagine having to print an “L” and having to print it as we see it, vertically. Given the generous support, the base of the “L” would have no problems but the vertical part probably would. In this case, surely increasing the printing time of the single layer would help us, but if it were not enough, placing an “I” not too close could be decisive. We would basically print an “I L”. Of course, now you will say “but what do I do with this beautiful” I “? Nothing, but even with only a bad” L “you won’t do much …. 🙂
if you want to know more, if you need help write to info@3deasy.it
if you want to be updated on the next article, fill in the following fields to subscribe to the newsletter.
