
3D FINISH!
FINALLY A PRODUCT TO FINISH 3D PRINTS
Today I want to recommend an article that must not be missing in our drawers to finish 3d prints, 3d finish.
I received a sample of this product directly from RESIN PRO to try to verify its effective validity and ease of use.
It is a two-component resin specific to finish 3d prints, easy to use and in my opinion it guarantees an exceptional result.
how to use
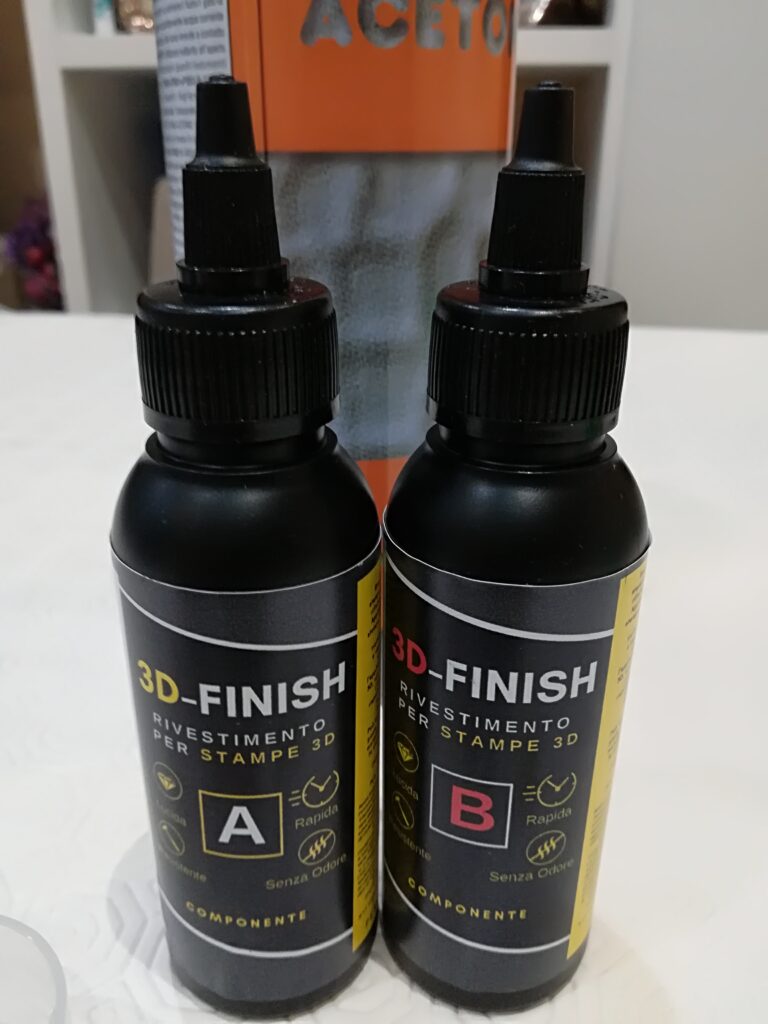
The resin comes in two very similar bottles but identifiable with a white A and a red B, the first one is the resin and the second one the hardener, as indicated on the package, they must be mixed proportionally with a ratio of 100: 45.
It has to be mixed well for about two minutes and then it has to be spread with the help of a brush directly on the piece.
Drying times is influenced by the ambient’s temperature in which the 3d finish resin is used, considering for example a domestic environment in just over a couple of hours the piece is ready to be further processed if needed.
Very little product is enough and my advice is to further decrease the amount of hardener in order to not to risk a too rapid drying but, as I already said, the ambient temperature influences this characteristic, it was too high in my case.
Another piece of advice that I allow myself to give to finish the 3d prints is to use a quality brush, which does not loses hair, the only problem that I had applying the 3d finish was caused by the low value brush that I had at arrangement.
Finish the 3d prints with 3D FINISH! Let’s see the effects
Let’s see immediately what changes on a piece treated with 3d finish.
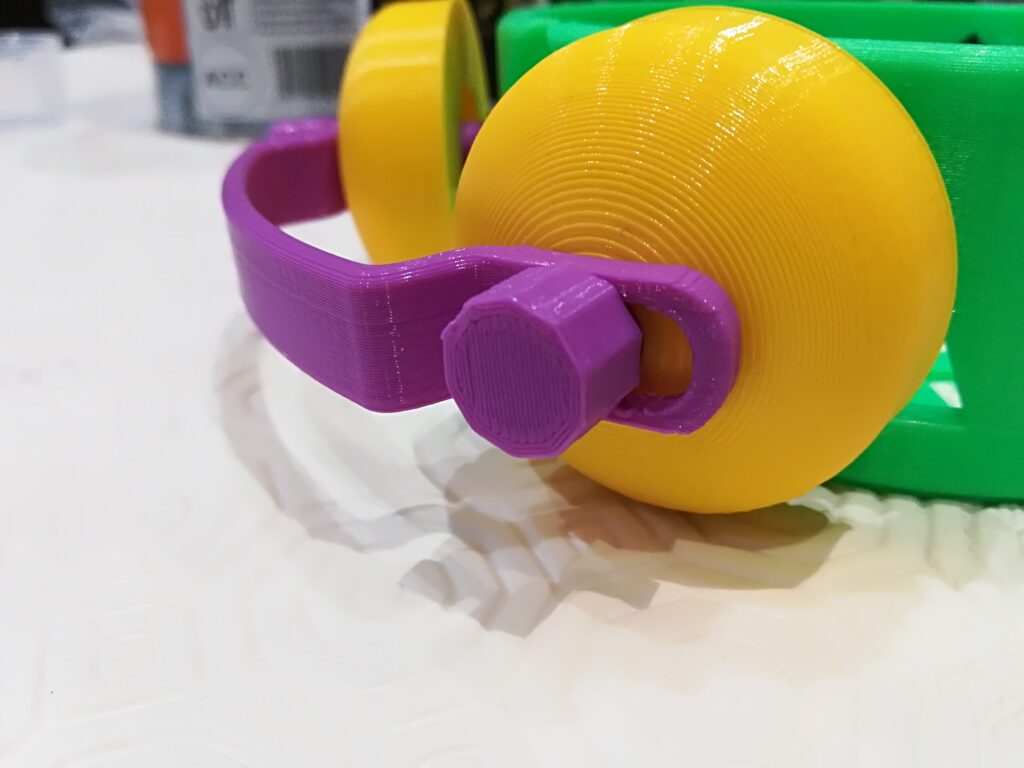
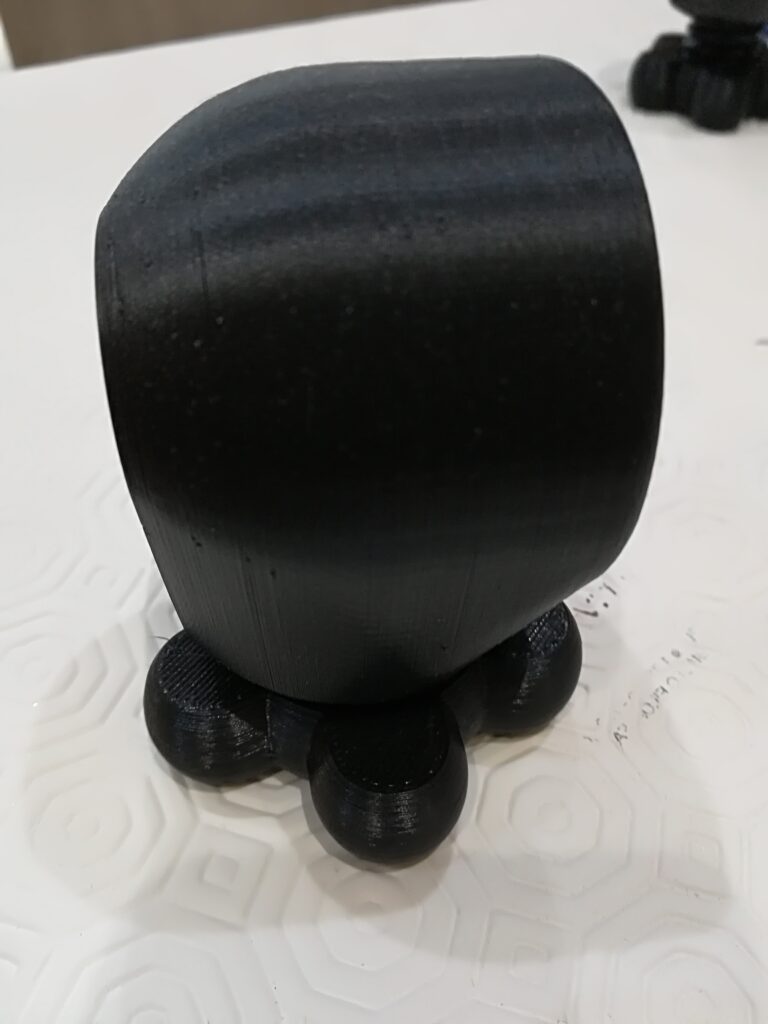
I wanted to test the product on pieces with different characteristics, one assembled and one with a thread.
Let’s see the first detail before the treatment.
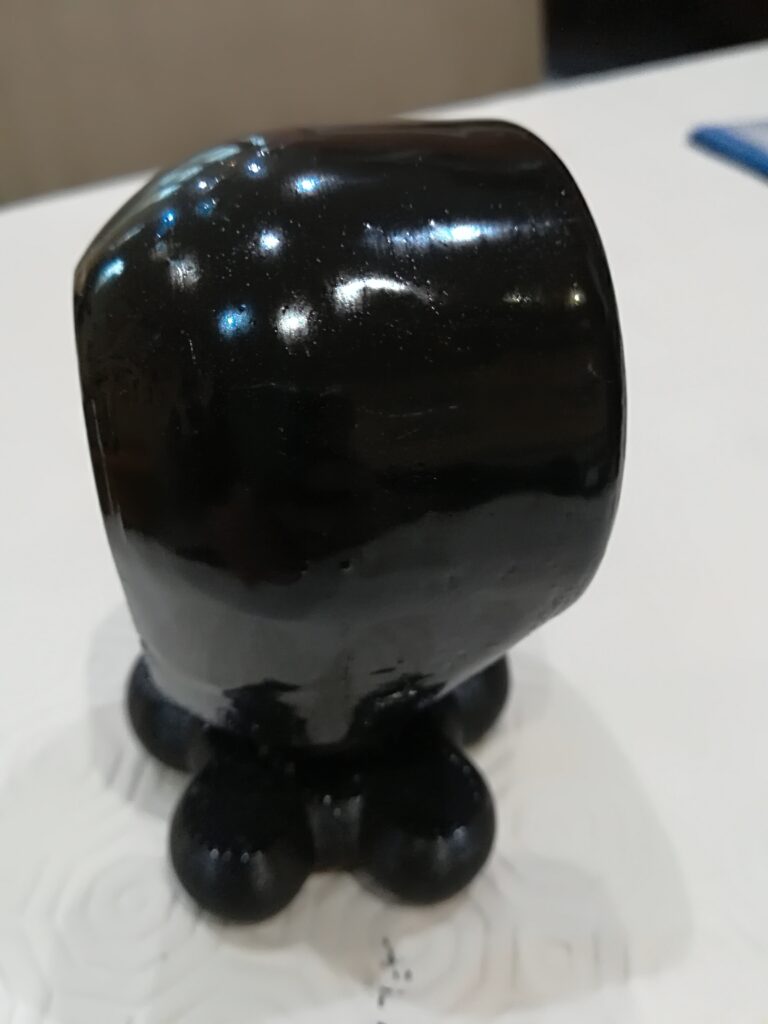
And after the treatment with 3d finish ….
The printing of this object was done with a layer of 0.25 and in the first image their marks are clearly seen, in the second picture they have disappeared, the print has become glossy to the point of not seeming made with an FDM printer.
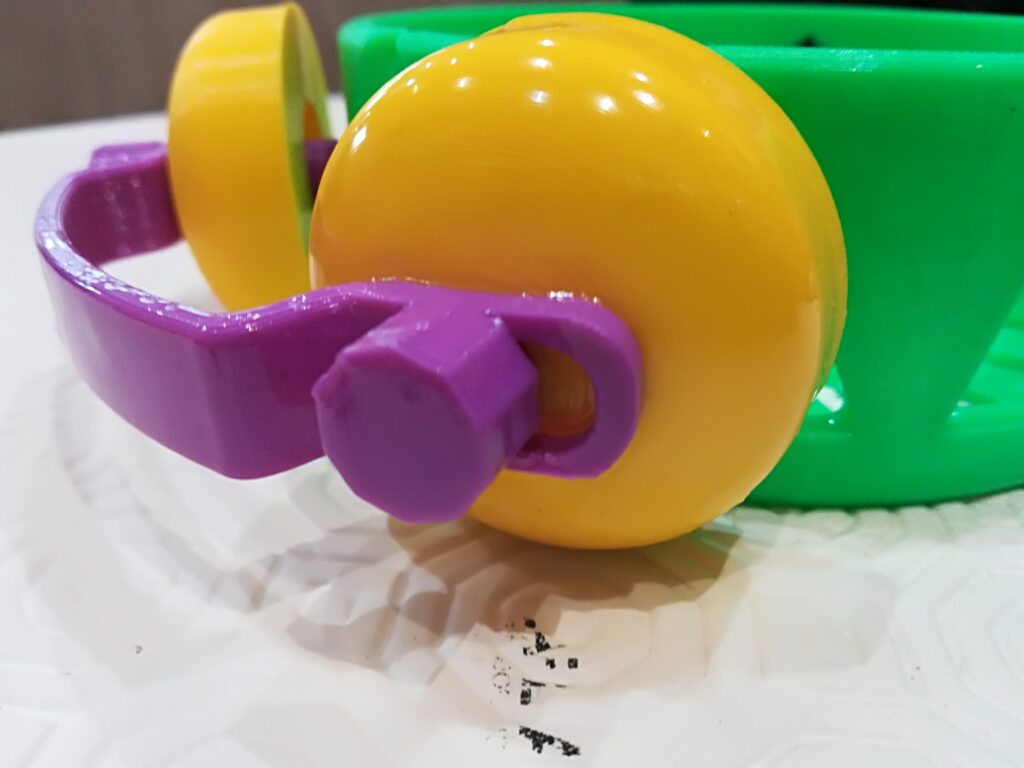
I purposely passed the resin only on half the object and this image makes us understand even more the improvements obtained.
After the treatment the piece can’t be disassembled, in fact the resin has kind a glue effect on it. It can be also used by people that are looking for a glue to PLA and other materials.
Below you’ll find the time laps of the preparation and the brush application.
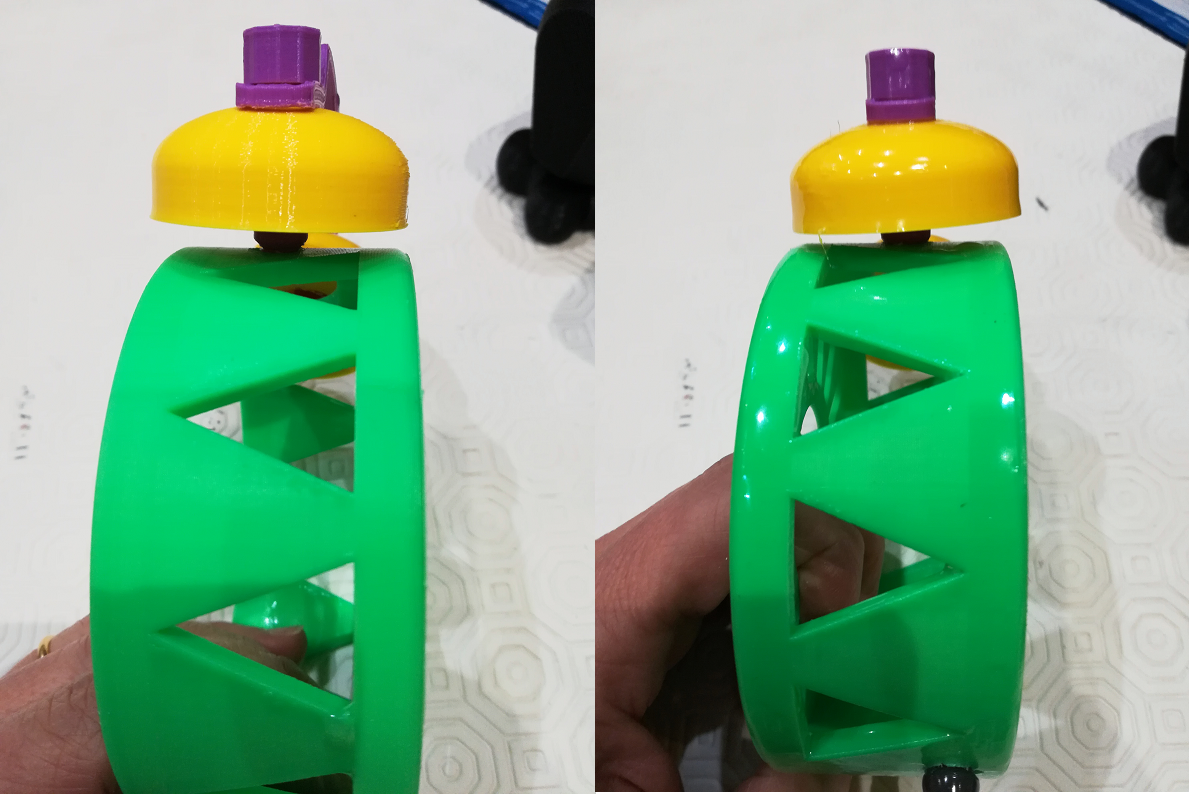
But let’s see another example.
Before the treatment…
and after treatment!
Following the time lapse relating to this draft
I also wanted to try it on the threaded part of the screw
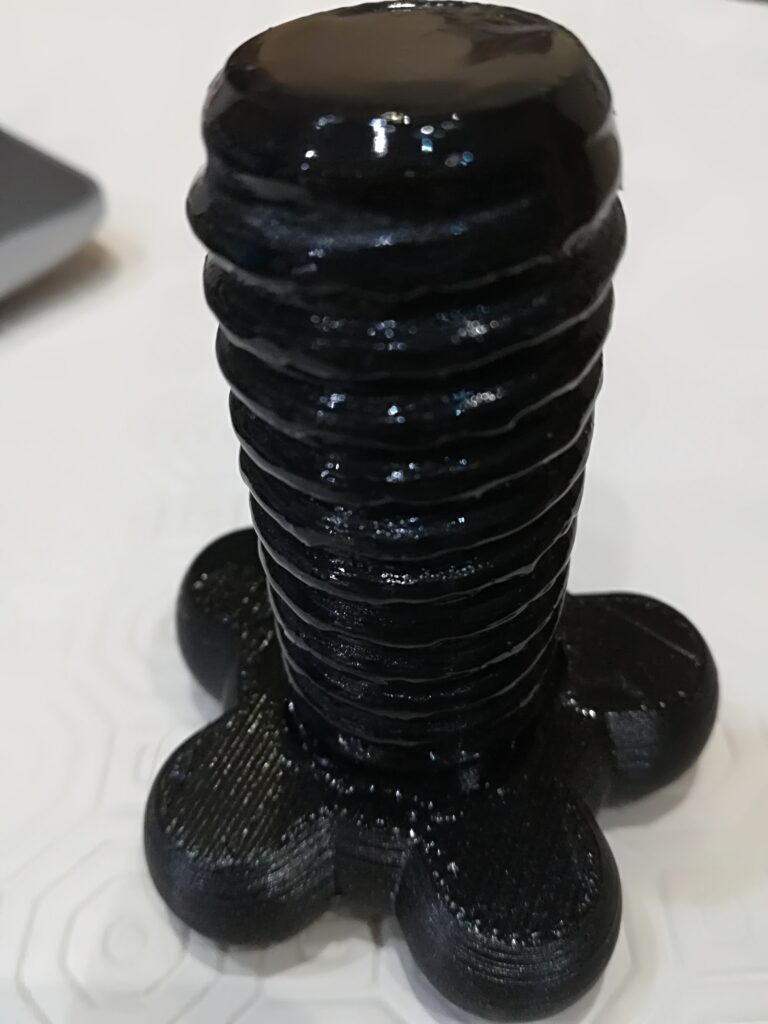
unfortunately the image does not render well but the resin settled perfectly on the edges of the thread, the only drawback by screwing and unscrewing it scratches a little, but I would say that it is inevitable.
I also used 3d finish to glue the base to the actual screw of the piece and now it is as if it were a single part.
3d finish acts as a covering film depositing itself on the printed piece, hiding the smallest “natural” imperfections of fdm 3d printing.
It strengthens the piece making it much more solid and insensitive or almost to shocks giving it an exceptional lucidity as you can see from the pictures.
Features of 3d finish
These are the characteristics of the product described on the manufacturer’s website
Odorless
Quick
Resistant
Sandable
Polished
High UV resistance
Excellent Mechanical Resistance
I feel I can safely confirm the first five, for the last two characteristics I would say it takes some time but given the premises…
For all the features and more specific uses, I refer you to the RESIN PRO page where you can find the product.
Sign up for the newsletter by specifying
3d finish to receive a 10% discount code on the product.
If you want to know more, if you need help or just want to be updated, write to info@3deasy.it or subscribe to the newsletter
Here you will find the nutcracker and here the container for alexa clock style used for the test.