
Creality Ender 3 an entry level to start well in the world of 3d printing
A friend asked me to assemble and calibrate an Ender 3 bought for his son who wants to start 3D printing.
It was delivered to me in its original packaging, well made and cared for for the protection of the pieces contained.
The Ender 3 arrives practically already assembled and following the simple and complete instructions available online the rest can be assembled in less than an hour.
All the part relating to the base, the carriage of the bed arrives already assembled, all that remains is to mount the power supply, the display and complete the structure with the vertical part of the z axis and the horizontal part of the x axis, carry out the wiring and the ender 3 is ready to print …. or almost.
Once the assembly of the ender 3 is finished, the first operation to do is the calibration of the endstop of the z axis and of the bed.
The operation turns out to be simple even if the impression is that the endstop of the z axis is complicated to mount at the right height, in reality it is enough to do some tests and in short you will arrive at the optimal result.
My personal advice is to adjust it according to the plate with the registers for leveling a little closed starting from the one at the bottom left of the ender 3, where the cables for heating the bed arrive.
first start and first test
Once turned on and connected to repetier host I tried to see if the movements of all the mechanical parts were fluid and immediately I noticed a slight laxity of the bed’s carriage.
I disassembled all the plate and the carriage to check the factory assembly and in fact there was a problem. A trolley wheel was slightly away from the profile on which it must slide.
Examining the wheel I noticed the presence of a half moon
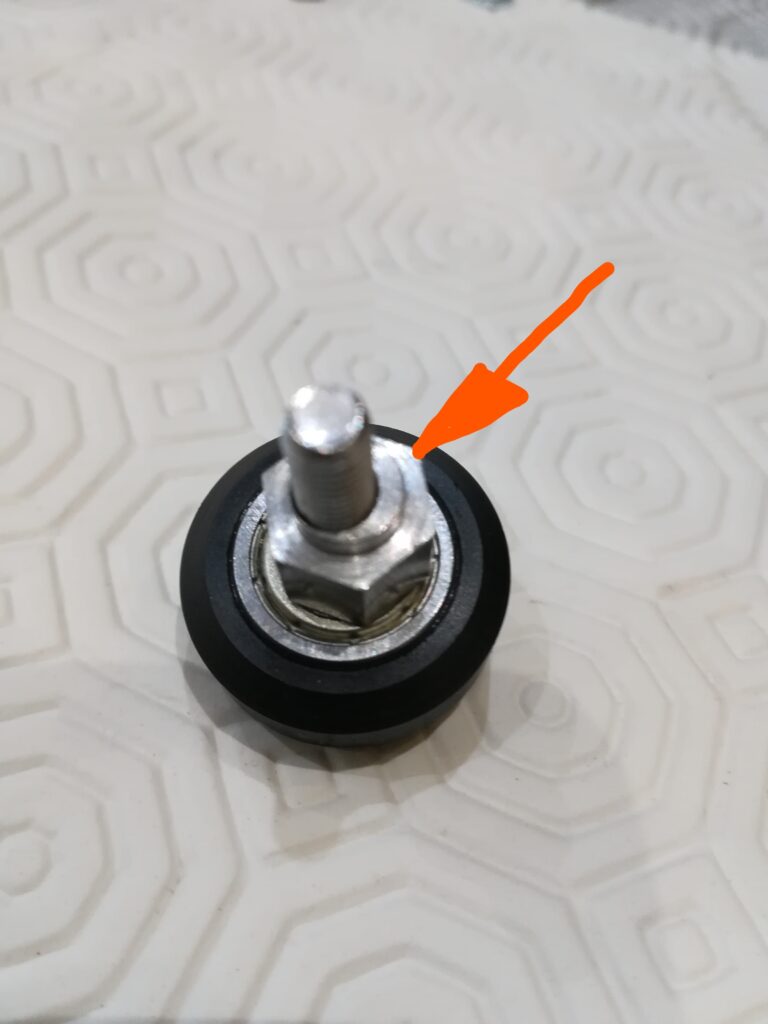
the half moon in question serves precisely to adjust the distance of the wheel from the profile.
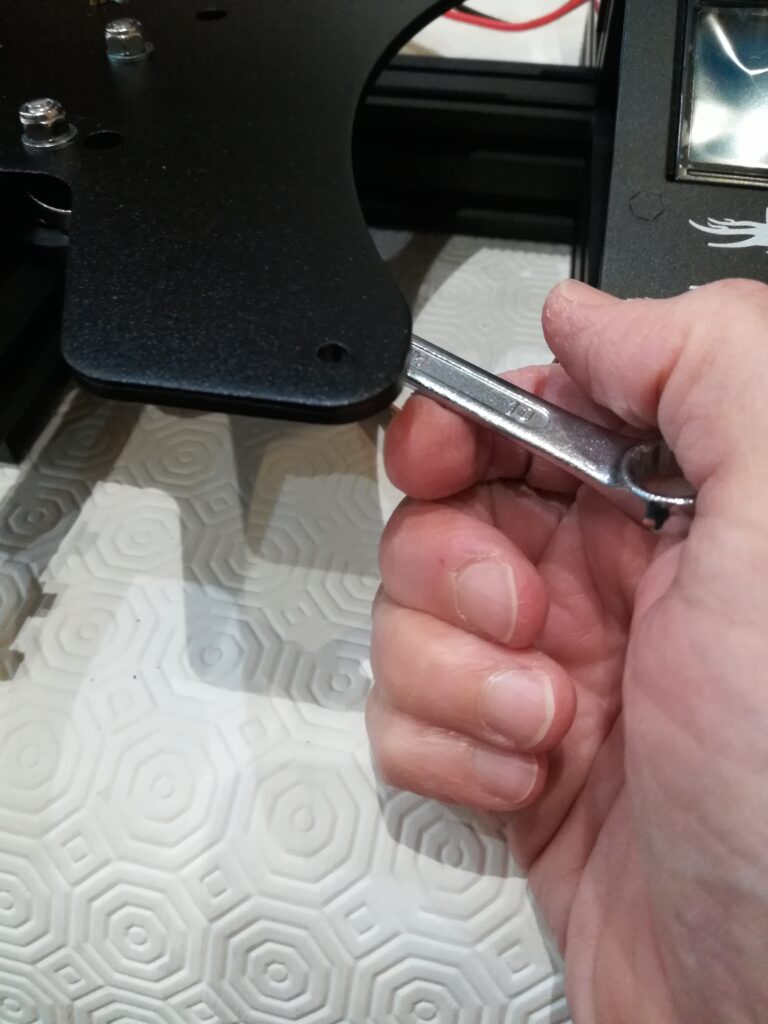
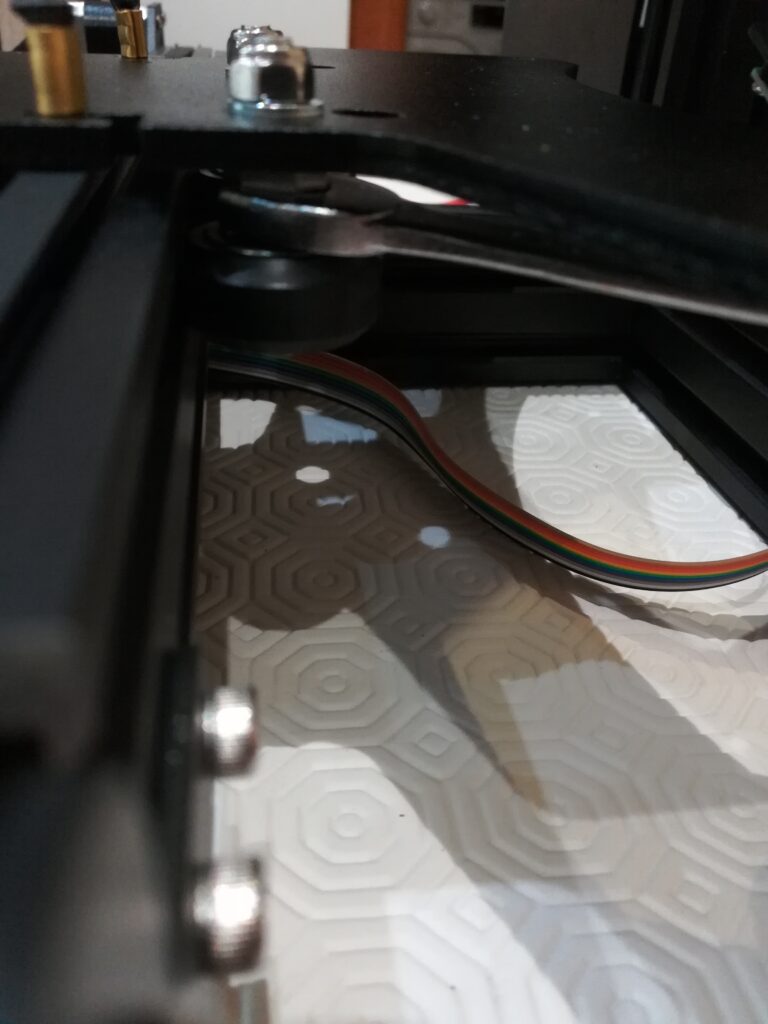
Simply loosening the nut that secures the wheel to the carriage and acting with a key 10 as in the figures that follow are unable to bring it closer to the profiled eliminating that yoke which at the moment is the only problem I found on ender 3.
the usual owl
After this adjustment and reassembled the whole carriage-bed part I rechecked the fluidity of movement of the deck and started throwing a print from repetire host, the usual owl. As slicers I used Cura Engine and left all the default parameters.
The print of the owl, after over an hour with layers at 0.25, was a bit greasy and with some very evident layers, especially in the upper part.
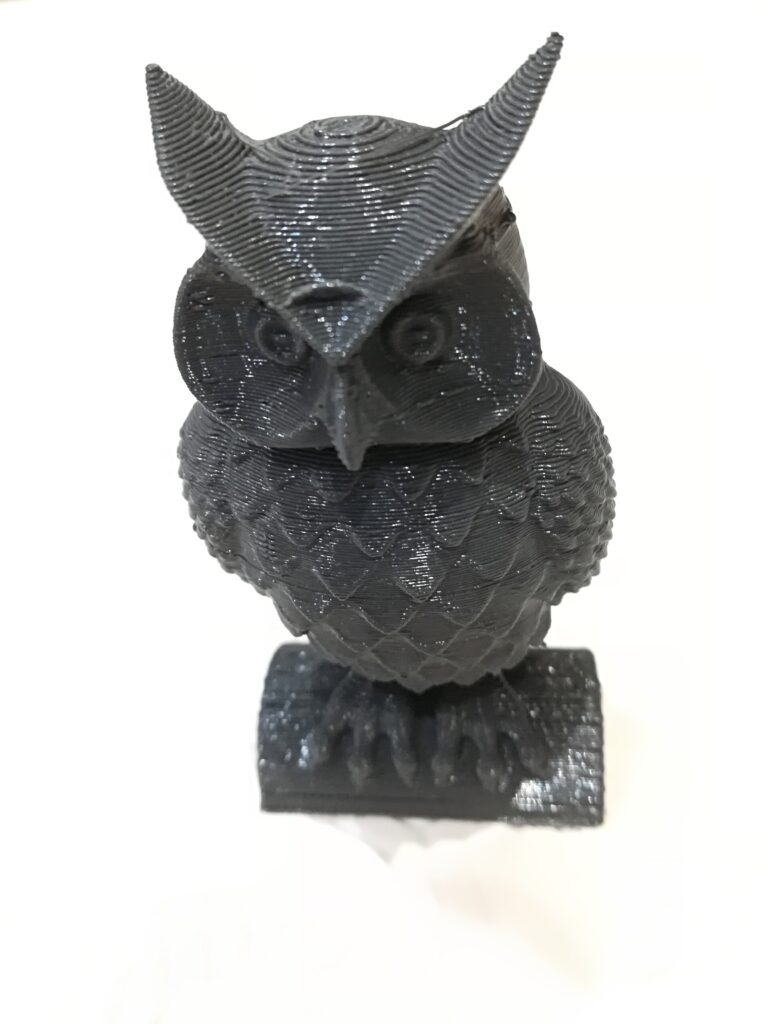
Not having set suitable values neither for temperature nor touched the speeds and retraction certainly contributed to not having a perfect result, but in any case the owl did not come very badly confirming that the ender 3 is an entry level printer that allows you to immediately print with sufficient quality.
I did some other print tests of pieces that I use to do tests by better adjusting the retraction and some speeds, especially related to the perimeters and the infill.
It emerged that by increasing the speeds, the extruder cannot keep up with the print speed and the print quality still deteriorates a little.
The ender 3 still remains a respectable entry level, simple to use and above all easy from the first use, no need for previous experience to start producing 3D prints.
Furthermore, by limiting the speeds, the print quality improves significantly.
In summary, if you do not need to have good quality prints in a short time, the ender 3 is an excellent printer. The prints of a good standard you will have the same only with a little longer times.
if you want to know more, if you need help write to info@3deasy.it
if you want to be updated on the next article, fill in the following fields to subscribe to the newsletter.