
Some tips to have a perfect first layer.
To have a perfect first layer has many positive aspects, first of all, to have a good adhesion to the bed.
Equally important is the physical aspect, often the first layer of the object is also the one exposed to the user view.
To get a perfect first layer, we take for granted that the 3d printer is well calibrated from a mechanical point of view, that is perfectly fitted.
Let’s check the bed
The first thing that may affect the result of the first layer is the calibration of the plate according to he height of the layer itself.
Before starting a print, especially if it is demanding and long-asting, it is always advisable to check the correct distance of the plate from the nozzle.
To do this is possible to use different methods, personally I use a thickness gauge with blades and depending on the slicing settings I choose the corresponding one.
For exampe, if I’m going to print with the first layer’s high of 0.2, I’ll choose the blade 0.2 to check the distance from the nozzle to the bed.
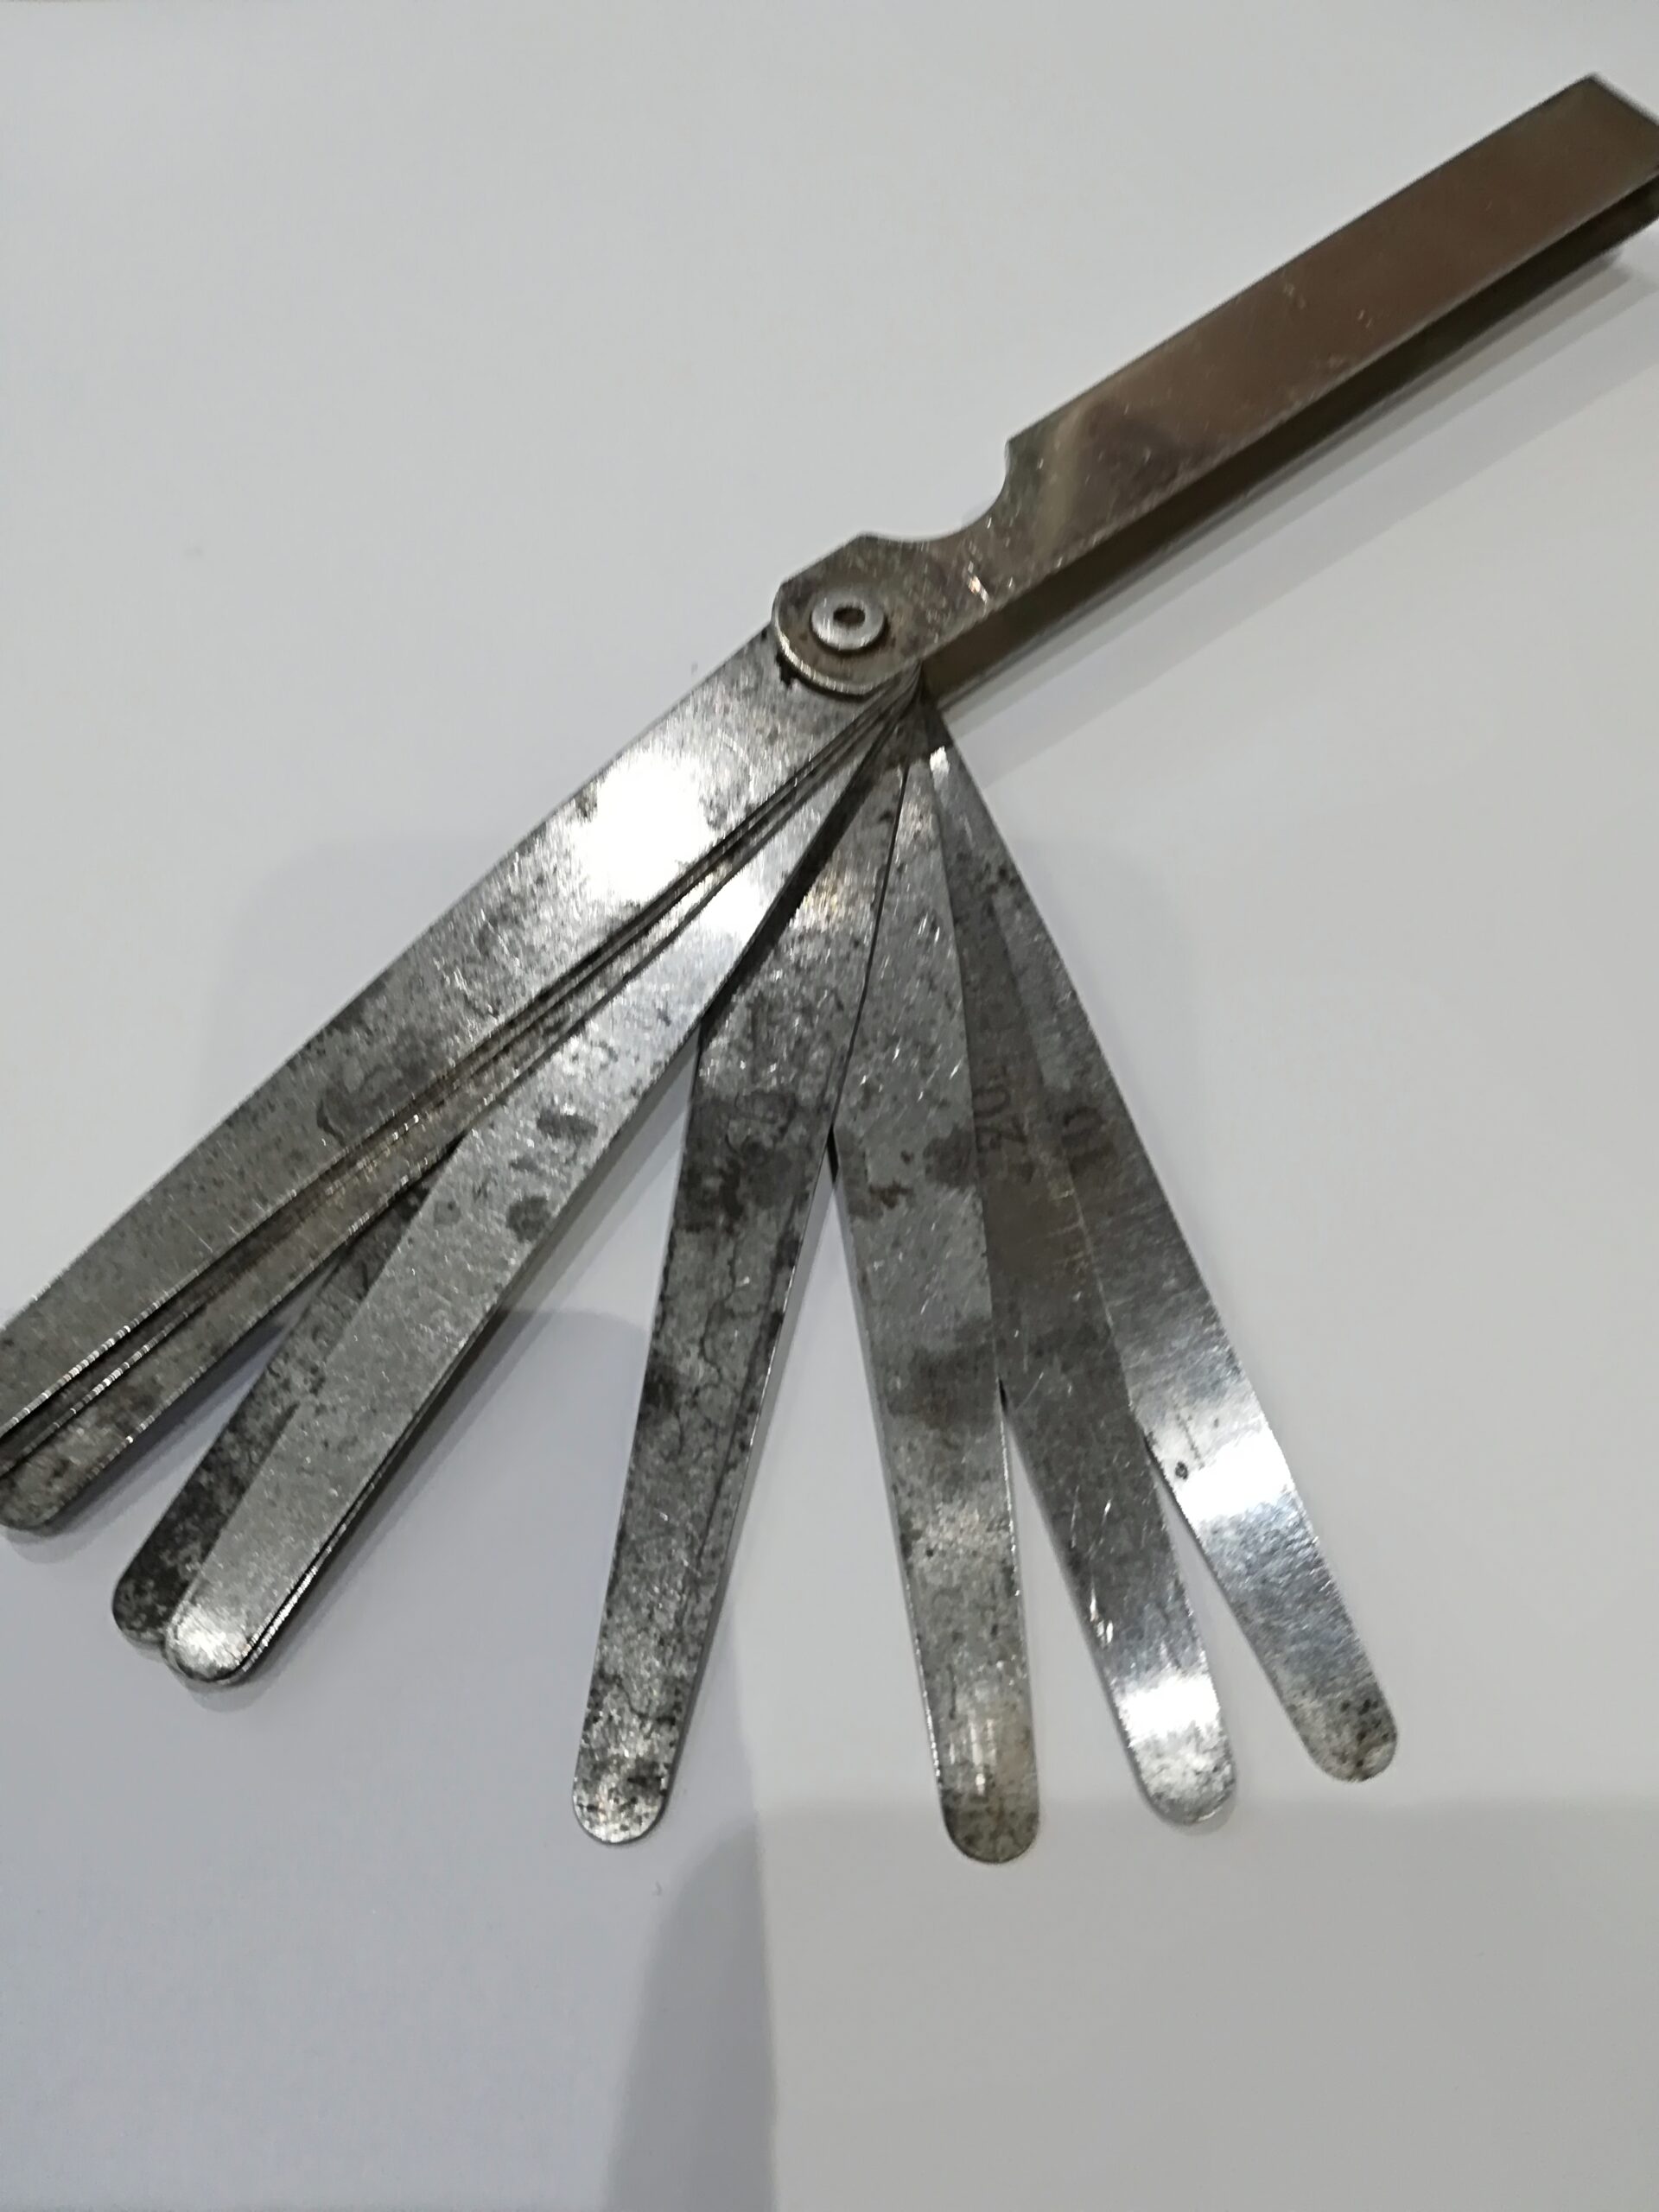
I repeat this operation for each corner of the plate, and I eventually do corrections by acting on the relative registers to fix the difference.
A test to verify that it has been correctly calibrated is to print a simple square that borders the edges of the plate.
By examining the square that adhered to the bed we will be able to verify that the deposition and adhesion of the filament was regular and homogeneous.

Tha’s all? No, a correct setting of the slicer also has its importance.
Most slicing software dedicate some settings only to the first layer, for example to improve adhesion, brim and speed for correct deposition of the material on the plate.
Skirt
One of the various settings not to be overlooked is the skirt, which is one or more lines drawn around the first layer whose purpose is to prepare the hotend to work correctly.

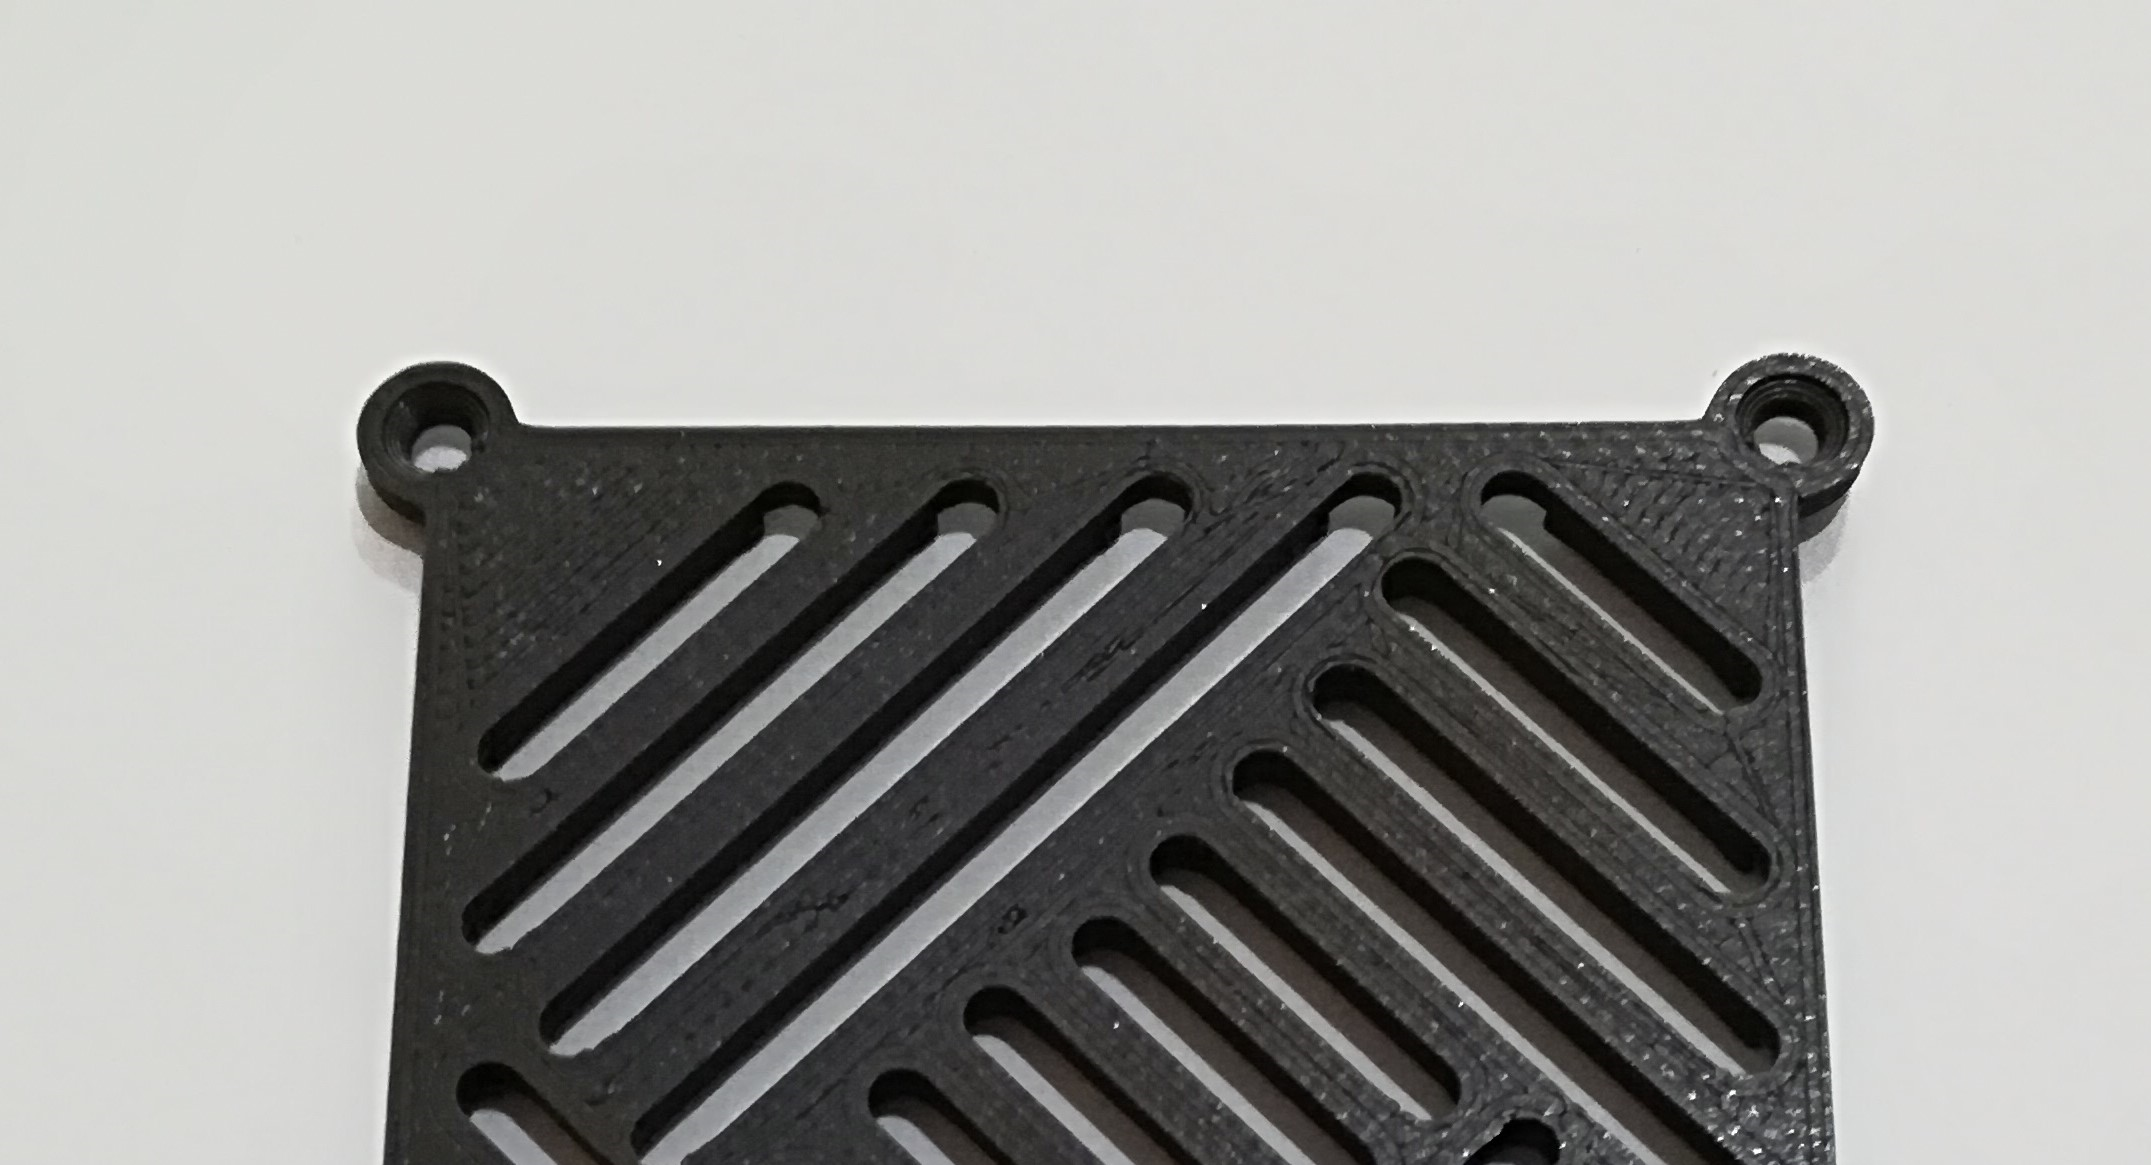
What does the activation or not of the skirt lines involve? The following image is quite explanatory. Without the skirt, a melt of molten filament was deposited on the first layer.
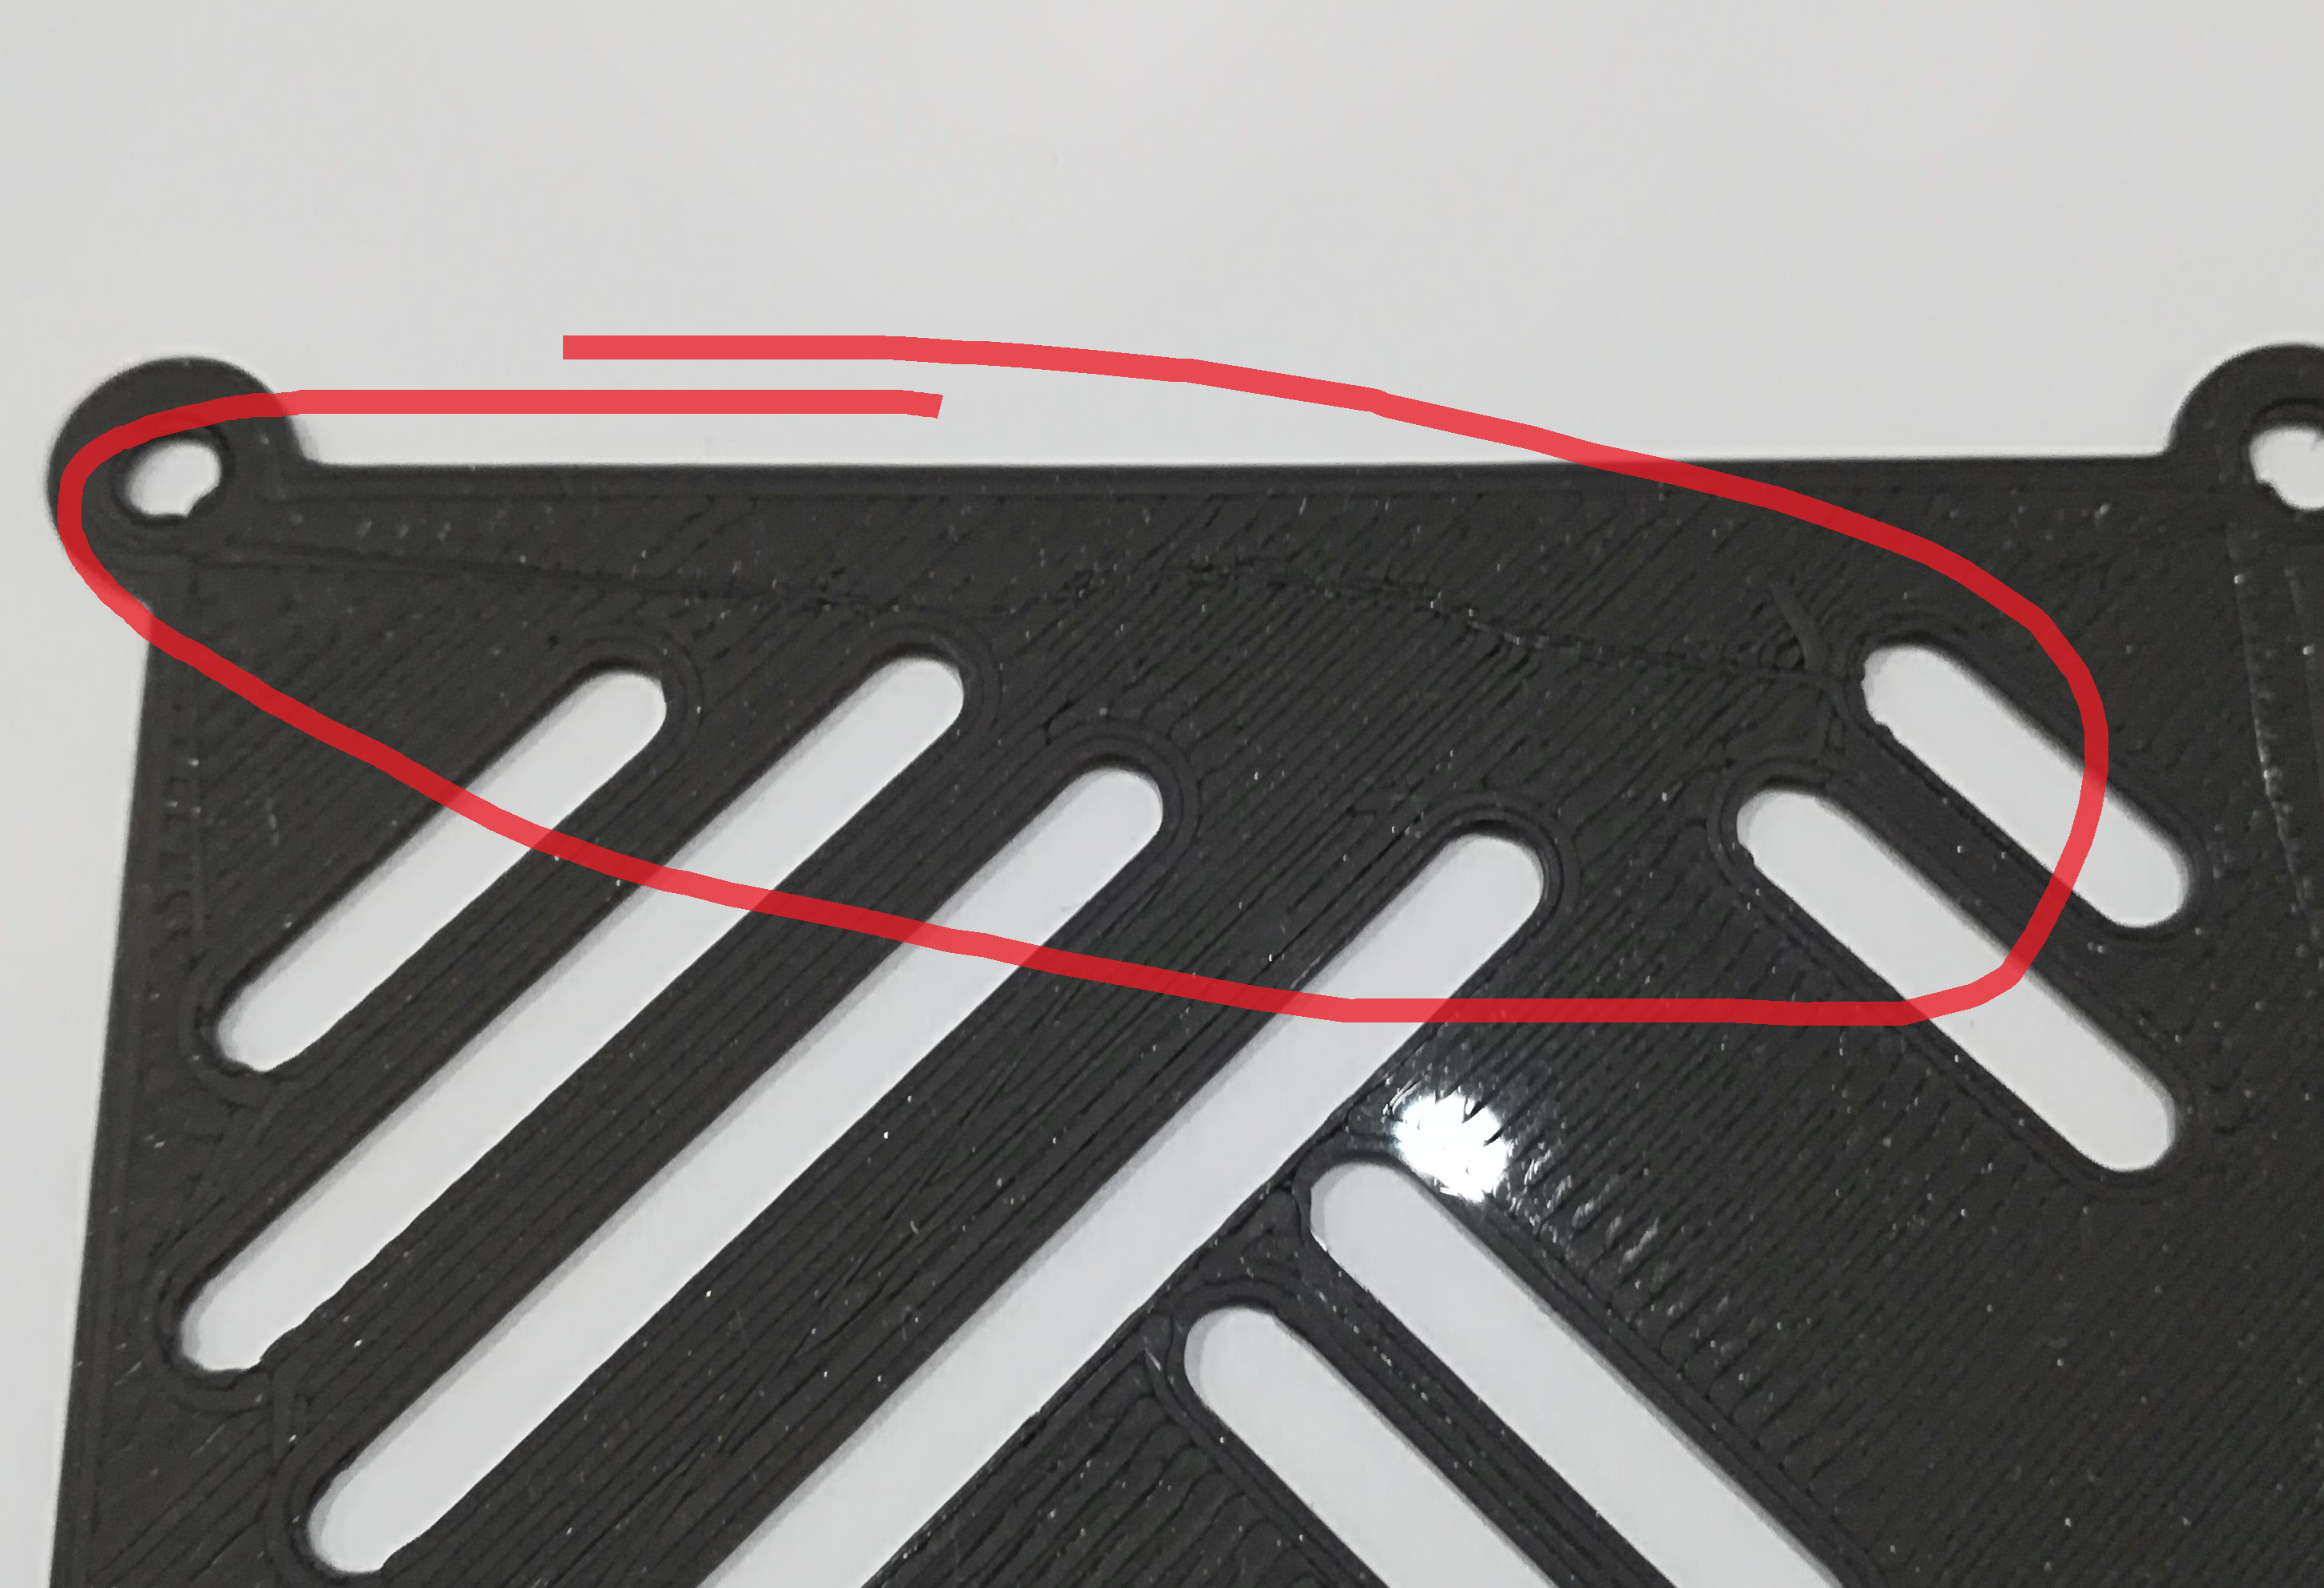
The skirt line that has been created before the print of the piece, allowed the filament to reach the right pression in the hotend and in the same time to evoid unpleasant castings of residues responsible of the upper picture.
Brim
The brim is a freame attached to he firstlayer, a kind to be removed at te end of the print.
It creates a wider support base than that of the piece we have to print, improving its adhesion to the plate.
We’re going to waste a little of material, but we will hae so many advantages by using it.
In many cases it avoids warping and helps to give stability to the piece during the printing phases, especially if it concerns objects that occupy the printer for several hours.
Some other settings
Other settings on which we can act are obviously the speeds relative to the first layer which as I always repeat, has to be as slow as possible, to get the best result that you may desire from all points of view.
Another help to improve the first layer comes from the settings relating o temperature and quantity of extruded filament during its construction.
Many slicers offer these possibilities, and increasing the extrusion’s temperature by a few degrees on the first layer helps to improve adhesion to the bed.
Working on the amount of extruded filament allows us to have a better and more effective deposition of the filament in the case of particularly small nozzles and very low layers.
if you want to know more, if you need help write to info@3deasy.it
if you want to be updated on the next article, fill in the following fields to subscribe to the newsletter.