
What is the purpose of enabling supports in 3d printing? If you are reading this article you already know what an FDM 3d printer is and how it works and that is that it is able to “build” a shape by depositing plastic material layer upon layer.
Yeah but what if I have to print a house with a balcony? a shape with a cantilevered part? coming out of the print base of the object?
Slicers software are our friends…
All the best known slicers provide a feature to print our balcony or the piece with a cantilevered part. How?
With supports….
The supports are nothing more than structures not originally present in our drawing and which are added by the slicer when suspended parts are detected. Practically the software realizes the lack of a support layer and almost autonomously creates it.
Of course, in fact, the design of our piece is changed as unexpected parts are added and in the end our print will not be quite as we wanted it. We will have more structures but these will be easily removable thanks to the slicer settings related to the supports.
Let’s see better….
Let’s take this for example dragon from thingiverse, let’s put it in our silcer – I continue to get along well with Repetier and cura engine – and let’s start slicing with our usual settings.
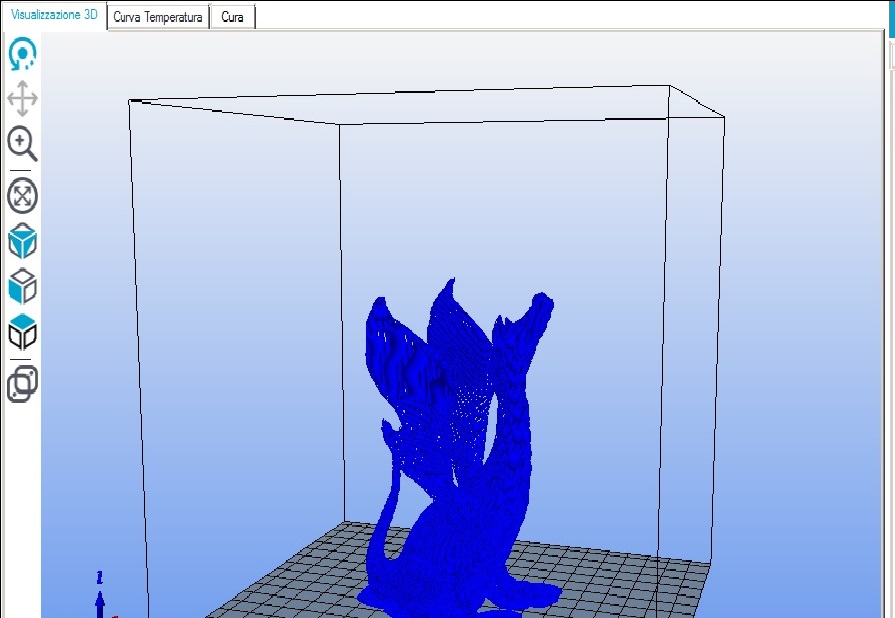
even if from the image it is not highlighted perfectly, there are parts that do not have a base on which to rest, let’s see them better.
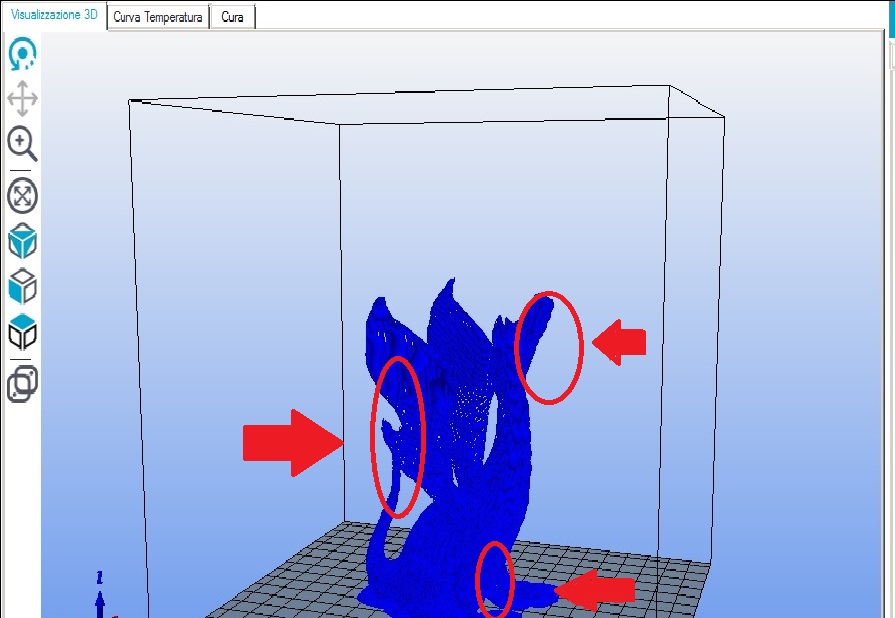
Surely the wings of the dragon do not have a base on which to be built and even a part of the belly and head are suspended in the air. Here comes the supports to help us, let’s enable them from the slicer.
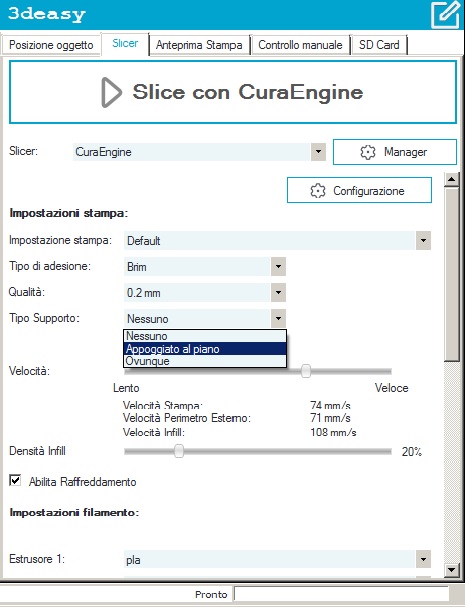
As we can see we have two options, leaning on the floor and everywhere. It is easy to understand the different effects of these two possibilities and above all to see their usefulness in different use cases. In the first case, supports will be created that will start “only” from the print support surface to help the parts suspended on the bed. In the second case, the supports will also be created within our figure. Let’s imagine we want to print a ring resting only on the circumference. With the supports everywhere option, our ring will be printed with both external and internal supports for the upper part of the circumference.
In our case it is sufficient to use those resting on the top and by redoing the slicing with the supports function on the top we will obtain this result
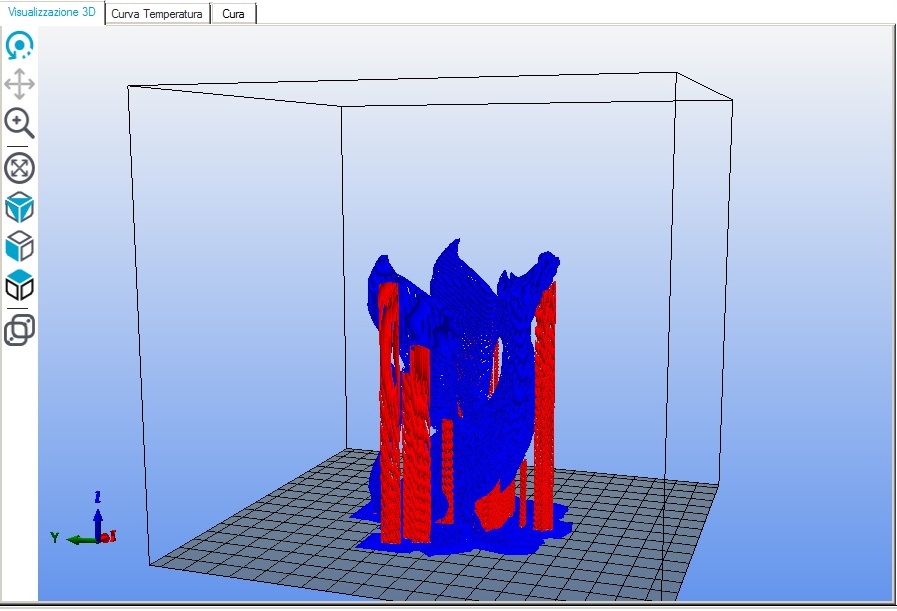
The parts in red are the supports that the slicer has evaluated to be necessary for a good final result of our print. Eventually our media print will look like this
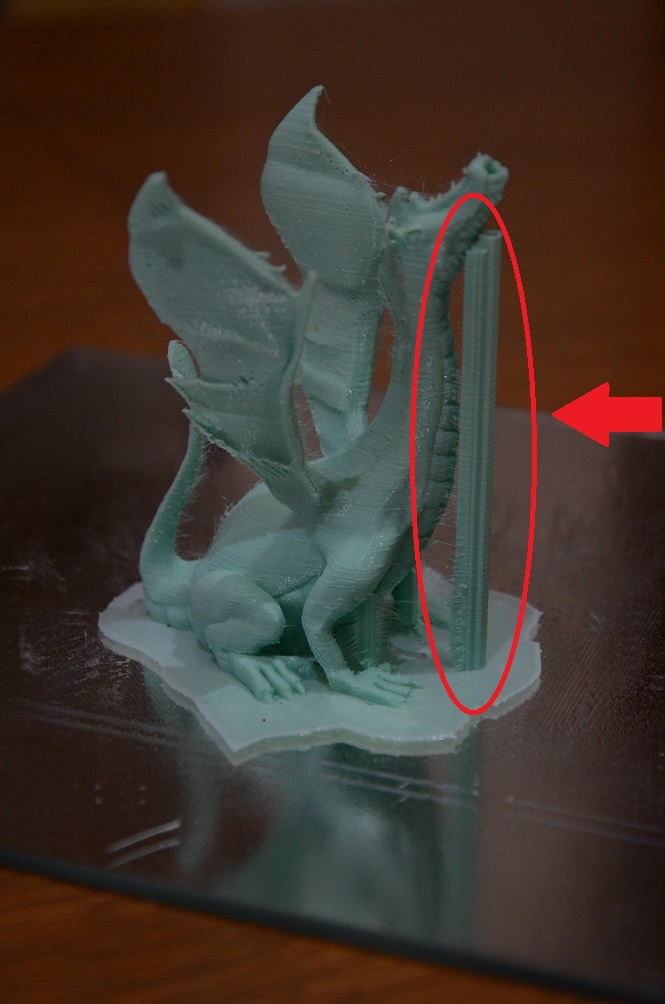
How highlighted in red is the support created for the lower part of the dragon’s face, and the other supports? those for the wings? simple, we removed them after printing. As? simply by detaching them.
do the supports leave marks?
Unfortunately yes, the supports, as such, are attached to the parts they support during printing and therefore some signs of contact remain but the slicer helps us in this too, allowing us to adjust some of their settings. Let’s see them.

Grid
It allows us to choose between supports made as a grid or as simple lines …. obviously the more contact points we have the better the yield of the supports but the work we will have to perform to clean the residues will be greater.
Overhang angle
It allows us to decide when we need the supports. Basically we set the need to create supports or not according to the exposure of the suspended parts, a value close to 0 ° indicates only parts in the “void” differently even with a slight protrusion.
Fill density
It indicates how dense our supports will be, a high value will contribute to their good effect but will make their elimination more difficult and their signs more evident.
XY distance
The distance between the horizontal walls relative to the X axis and the Y axis. The higher it is, the easier it will be to remove and the fewer marks left, but the result of the supports will also be less noticeable.
Z dostance
With this parameter we indicate the distance between the base and the surface of our drawing and the supports, to be carefully evaluated, it depends on the ease of subsequently eliminating the supports.
With a little practice we will certainly be able to set the best parameters for the construction of the supports for our prints and with this article we hope to have provided you with at least the starting point to be able to work on it.
if you want to know more, if you need help write to info@3deasy.it
if you want to be updated on the next article, fill in the following fields to subscribe to the newsletter.